|
|
|
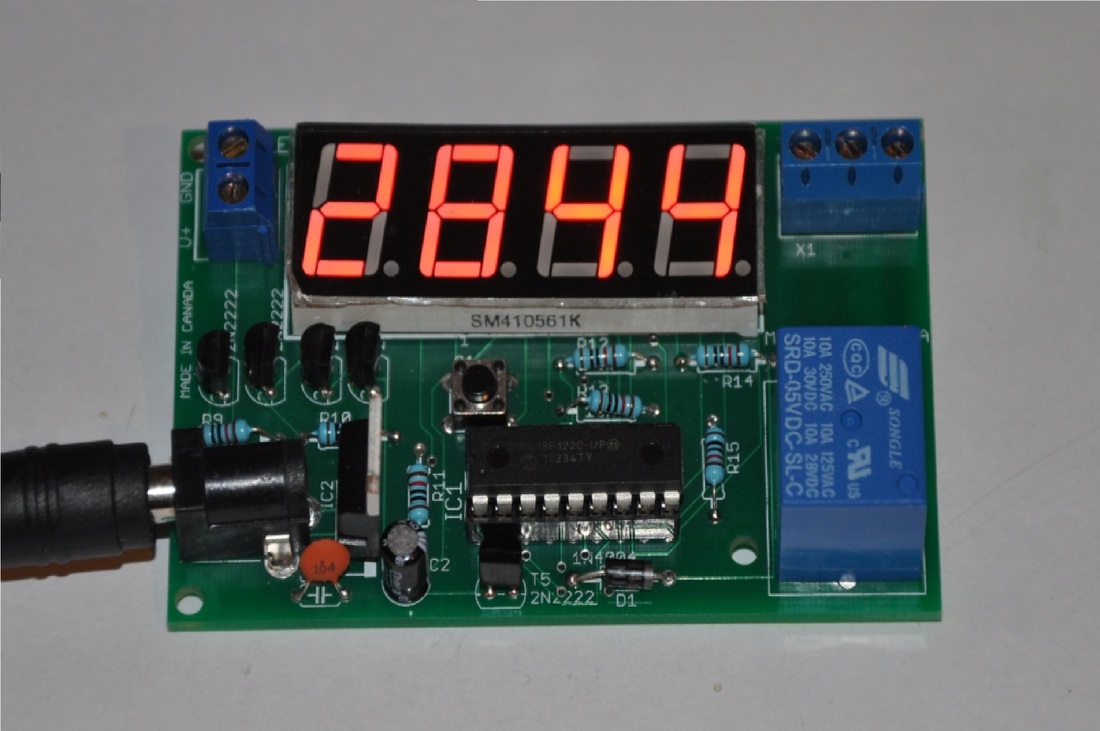
Fully assembled countdown timer module
with relay control - Includes AC adapter
This listing is for an awesome little countdown timer that can control AC or DC devices via an on board relay. It was designed for paintball game enhancement. This module is FULLY ASSEMBLED & TESTED in house prior to shipment, and includes an AC adapter for plug and play operation! This device was designed initially for paintball/airsoft applications, but it can be used for many other applications. One of the neatest things about this board is that the user can initiate a sequence where the countdown time is multiplied by 20x, which means that the countdown timer counts down 20x as fast. Just like in the movies! I'll talk about that more in a second. There is only one button that is used for programming. It is extremely easy to use! I'll discuss the operation below, the but above video acts to serve as the main manual for this product. Be sure to watch it! We also sell these in DIY kit form. We will be selling many variants of this product. This specific listing is for a fully assembled and tested module with an AC adapter. We have another listing that does not include an AC adapter for $6 less.
Basic Operation:
This device can be programmed up to 99 minutes and 59 seconds (9956), so there is a limitation relative to time. Upon power up, the right most digit will show a "0". This is the "Second" digit, and it can be programmed up to a value of "9" by tapping the S1 button. If the user increments this digit past a value of 9, the digit will reset back to 0. Once you are done programming the "second" digit, hold the S1 button down for a few seconds, then let go, and the next digit to the left lights up. This is the "10-second" digit, and it can be programmed up to a maximum value of 5. The right most digit and this digit work to program the seconds of the counter up to a maximum value of "59". Once you're done programming the 10-second digit, hold the S1 button down for a few seconds, then let go. the digit that is second from the left will light up. This is your "minute" digit, and it can be programmed up to a maximum value of 9. Once you are done programming this digit, hold the S1 button down again for a few seconds, and then let go. The left-most digit lights up, and this is your "10-minute digit". You can program this up to a value of 9. Once you've programmed in this digit value, press and hold the S1 button one more time, then let go. No digits should be lit up. From here, one quick tap on the S1 button will start the countdown.
Pause:
When in normal use (Counting Down), you can pause the countdown timer by simply tapping the S1 button once. You can un-pause by tapping S1 again. When in pause mode, no digits will be light up, and the device will consume <1mA!
Reset:
When is normal use (Counting Down), you can reset the device by holding the S1 button down for a few seconds, then letting go. This is a software-reset (Soft Reset).
FAST Countdown Mode:
This is more for prop purposes. For paintball users, you might want to hold off. We will very soon have other devices in stock that will have this same application, but made specifically for paintball. The user can initiate a fast countdown by applying a 5v signal to the pin on the back of the board labelled "4". Once a fast countdown is initiated, it is impossible to stop it, but the user can pause/reset the device at any time. If you are looking for paintball specific props, we will have this same module more-or-less that you cannot pause/reset. If you have any questions, please let me know!
There are 6x pins on the back of this device that allow for you to interface with it. Once 4/6 are used.
If you want to interface with another device to initiate a fast countdown under certain circumstances, or if you want to use your arduino to pause or reset the device, all you need to do is interface with the back of the board. There are 6x pins labelled:
GND: This is a ground point. If you are interfacing with another device, be sure to connect this pin to the ground on the board being interfaced to the counter.
5v: This is the regulated 5v line on the board. It can supply up to 800mA safely to an external circuit if you wish.
0: This pin is not to be used for anything
1: If you have an open sink output, you can cause a reset or pause by having your external board sink this line low. There is a default of 5v on this line (10k pull up). If you use an open sink output to pull this line down for a moment, it will pause. If you do this again, it un-pauses. If you use your board to hold this line down for more than a second, it will reset the device once the line is freed again.
4: If a 5v pulse is applied to this line, a fast countdown will be initiated. Once initiated, it cannot be stopped.
5: This pin is not to be used for anything.
The Relay:
Once the time on the counter reaches 0000, the relay will turn on. The relay is a high power switch that is isolated internally. The user can turn off the relay by pressing down the S1 button which will also act to reset the device. The traces on the board for the relay are thick, and can handle between 40-50W of power. Powering an AC lamp is no issue. Powering an electromagnet or solenoid is also no issue. The relay contacts are labelled NO/NC/CO.
CO: This is the common pin. When the relay is off, the CO pin is connected internally to the NC pin. When the relay is activated, the CO pin disconnects from the NC pin, and connects to the NO pin.
NC: Normally closed. When the relay is off, this pin is connected to the common pin. When the relay is on, this pin is open and connects to nothing.
NO: Normally open. This pin connects to the common pin when the relay is activated. When the relay is off, this pin is open and connects to nothing.
If you have any questions, please do not hesitate to ask.
Additional Information:
There are two ways to power the board. There is a 5mm jack port for a 7-12v wall adapter. If you want a compatible wall adapter, look for the listing variants for this module in my store. I sell a variant of this listing that includes a 9v adapter. Plug and play. You can also use the 2-pin blue terminal block. There are 2 pins here.
V+: Apply 7-12VDC to this line if you do not want to use the jack
GND: This is the negative supply line (DC Ground).
Specifications:
Board Length: 83mm
Board Width: 54mm
Board Height: 22.5mm
Power Supply Requirement: 7VDC-12VDC (9v Nominal)
Standby Current: <1mA
Current Consumption: (relay On): Roughly 70mA.
Disclaimer:
This prop module was created specifically to enhance your tactical gaming experience. Engineeringshock Electronics, paintballprops.com, and any affiliates of Engineeringshock Electronics will not be held accountable for losses or consequences caused by the misuse of this product, or any of our products. Furthermore, we will not offer servicing on products that have been modified in any way. By purchasing this product, you are agreeing to the above statement. Engineeringshock Electronics, paintballprops.com, and any affiliates of Engineeringshock Electronics prohibit the re-sale of this product, or any of our products. This product has been designed for the specific use of applications and may not be used for unlawful purposes, uses that are expressly prohibited under the terms, conditions and purpose of its use and diversion contrary to Canadian export laws. No guarantees are given or implied as to the product efficiency and performance. Company, its consultants, partners, agents and employees shall not be liable for any claims, losses, expenses, injuries, or damages arising from or related to the product
What Comes With This Listing:
1x FULLY ASSEMBLED & TESTED countdown timer board.
1x 9v 1000mA Wall Adapter