The Domination Box - Capture The Flag - Electronic Paintball Airsoft Milsim Prop
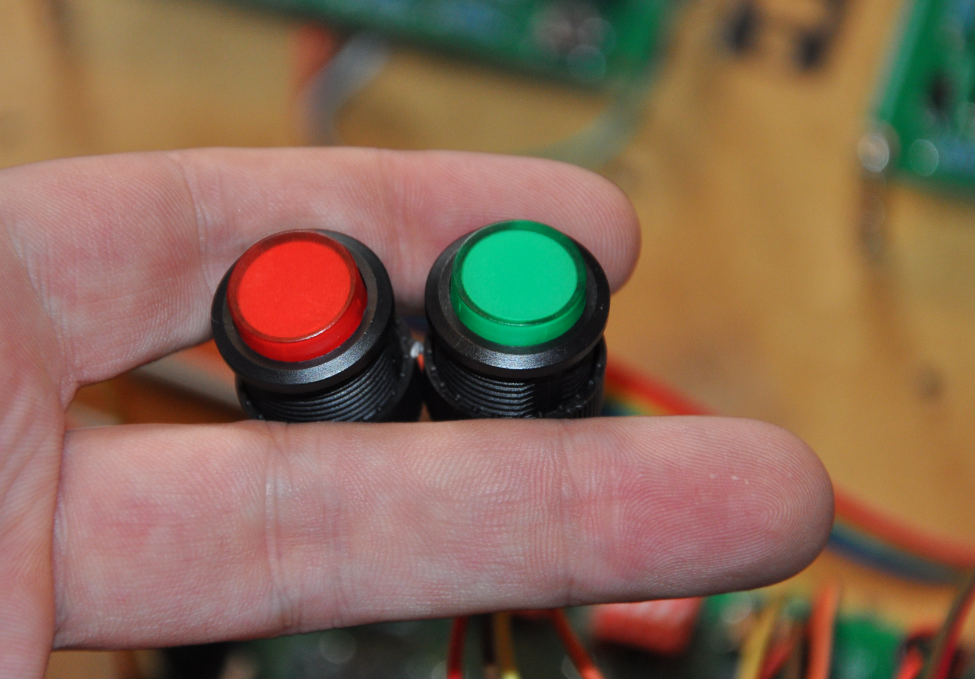
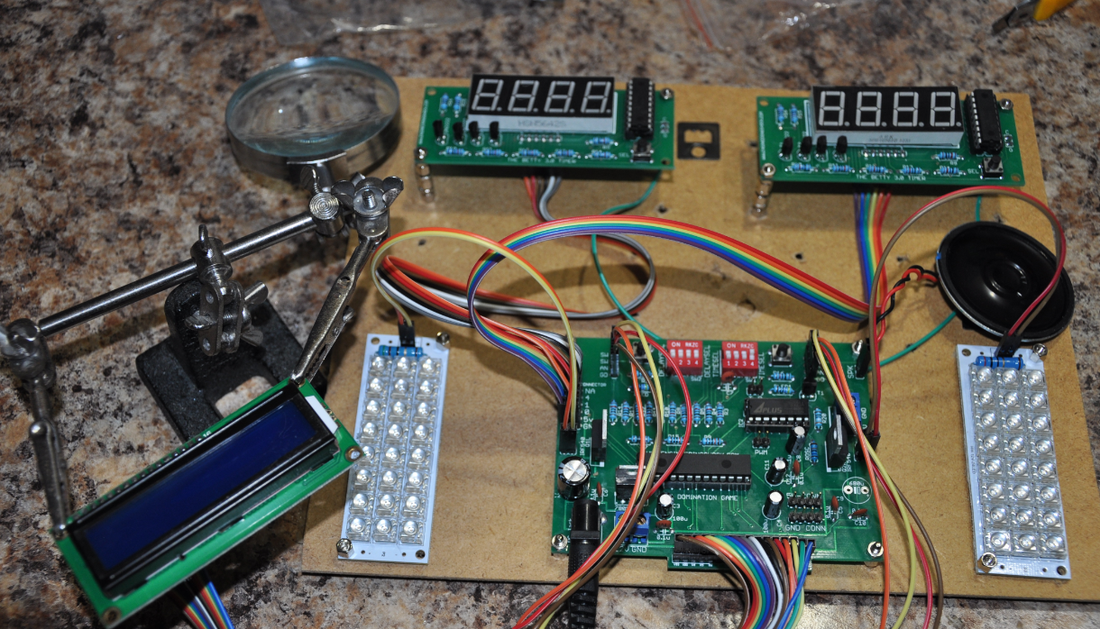
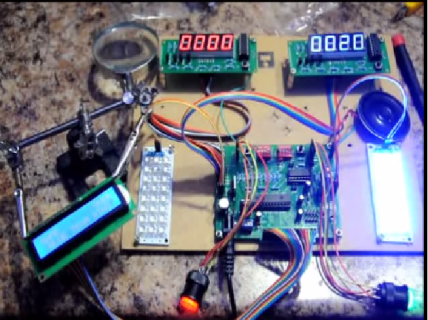
This listing is for one of our most in-depth paintball prop sets! This "Domination" box acts as a capture the flag game for two teams; Red VS Blue. The above video gives you a full demonstration on how to use this system. We include the electronics (Full assembled and tested), and you create the fixture in which you want to mount it in. This set speaks to you. It has an on board speaker that offers commands such as "Let's Play Domination!", "Red Team In Control!", "Blue Team In Control", and "GAME OVER!!!". This set also comes with an LCD that tells you what is going on in the game. There are two clock boards. One red and one blue. As well, this set comes with a red and blue LED bank and a red and green LED button that lights up! The red and blue clock modules and LED banks help you to know what is going on in the game, in addition to the audio commands and LCD readout. The video above goes into detail. We sell the electronics, and you make it your own! If after watching the video and reading the below information you still have questions, please do not hesitate to ask!
This Set Comes With:
1x Red Clock Board
1x Red Clock Board
1x Red LED Bank
1x Blue LED Bank
1x Red LED Button
1x Green LED Button
1x Control Board
1x LCD (Liquid Crystal Display) Module
1x 8 Ohm 1 Watt Speaker
ALL OF WHICH COMES ASSEMBLED, CONNECTED TOGETHER, AND TESTED AS A WHOLE!
How It Works: (Watch the video for a full demonstration - Highly Recommended)
Power Up:
When you first power up your board, the red and blue clock display modules will perform figure-8s until the system is configured. In addition, the unit will say "LET'S PLAY DOMIANTION". The LCD will also mimic this. Once the clock display modules stop the initial figure-8 cycling, the system will be ready for you to input a point value. The LCD will read "ENTER GAME POINTS!".
Entering Points:
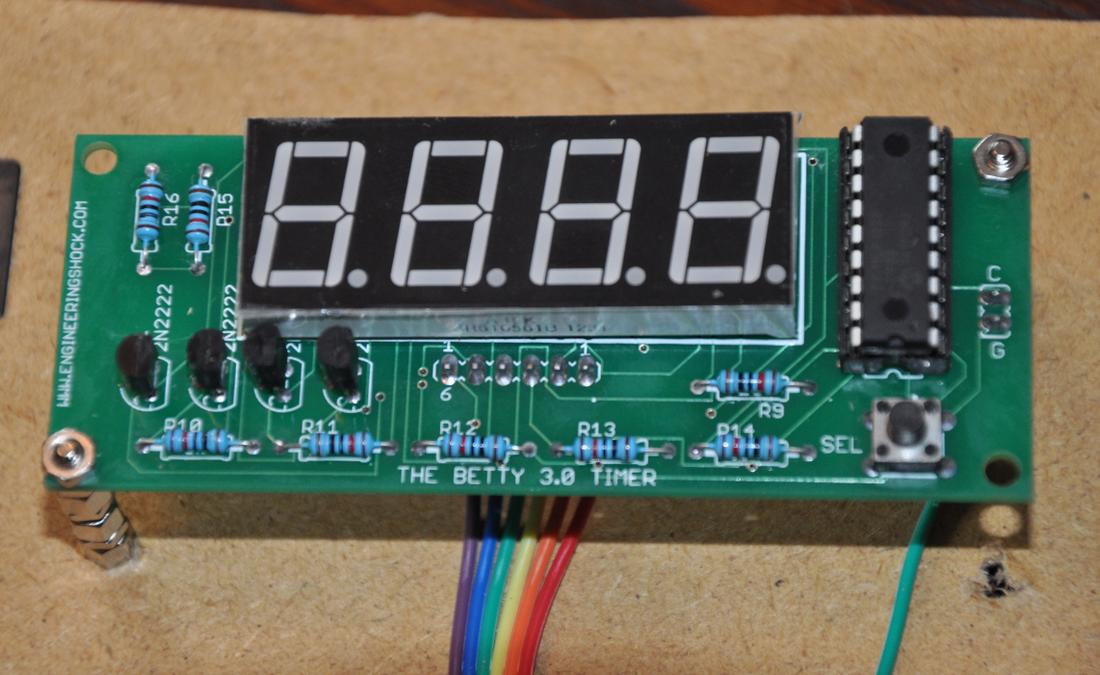
When the LCD reads "ENTER GAME POINTS!", this means that you program in any point value between 1-9999 for both teams. If you want, you can create a handicap for one team. If you want to program in different values for each team, then what you can do is remove single wire that connects the two clocks together. Notice that each of the two clock modules have a button on the right hand side. This button acts to program in the point value. Just to the right of the microchip on each clock module is a 2-pin header. The pins are labelled "C" and "G". You will notice that this set comes with one wire connecting the "C" pins on each clock module together. Remove this wire if you want to program in each team's point value separately. If you lave this wire connected, then either of the buttons can be used to program in the point value for BOTH teams. You will notice that the right most digits are lit up, and the left most digits are left dark. This means that you are ready to program in the value for the right most digit/ To increment this value, tap the button, but do not hold it. For instance, if I tap the button three times, the display should read "3". From here, press the button again and hold it. The display should go dark, and then the second digit from the right should light up. Again, taps increment, and holding the button down will allow for you to program in the value for the second digit from the left. Tap to increment, or hold to program in the left most digit. Once you've programmed in the last digit, press the hold the button down and...
GAME ON:
Once you have your clock modules programmed, the LCD will read "GAME ON", and both the red and blue LEDs will flicker. Please see the warning section of this listing. People who are prone to seizures/epileptic people should not be exposed to this unit. The brightness and intensity of the red and blue LED banks is very high. It is much more intense than seen in the video above. When the LED banks stop flickering, the game is ready to play. There are two delays that you can program in on power up by making selections on the two red 4-channel DIP switches on the main board. We will get to those delays in a minute.
Accumulating Points:
When a member of either the red or blue team presses their relative button and holds it down, the LCD will read:
"SETTING CONTROLS
1 2 3 4 5 6 7 8 9"
However, the unit will count from 1 through 9 before the team holding the button down starts to accumulate points. If the team member holding the button down gets hit while holding the button down, then he/she must let go of the button, and enter back to home base to re-spawn "so to speak". Once the LCD has counted up to 9, if the team member is still howling the button down, then the unit will say "RED TEAM IN CONTROL", or "BLUE TEAM IN CONTROL", depending on which team is at the domination box holding down their team button. The relative LED bank will also light up, and stay lit up until the relative team member gets hit and is forced to let go. Of course, there is an honour system here. That, or the game needs a referee. The idea is that if someone is at the box, other team members act to protect this person as best as they can.
The Programmable Delays!:
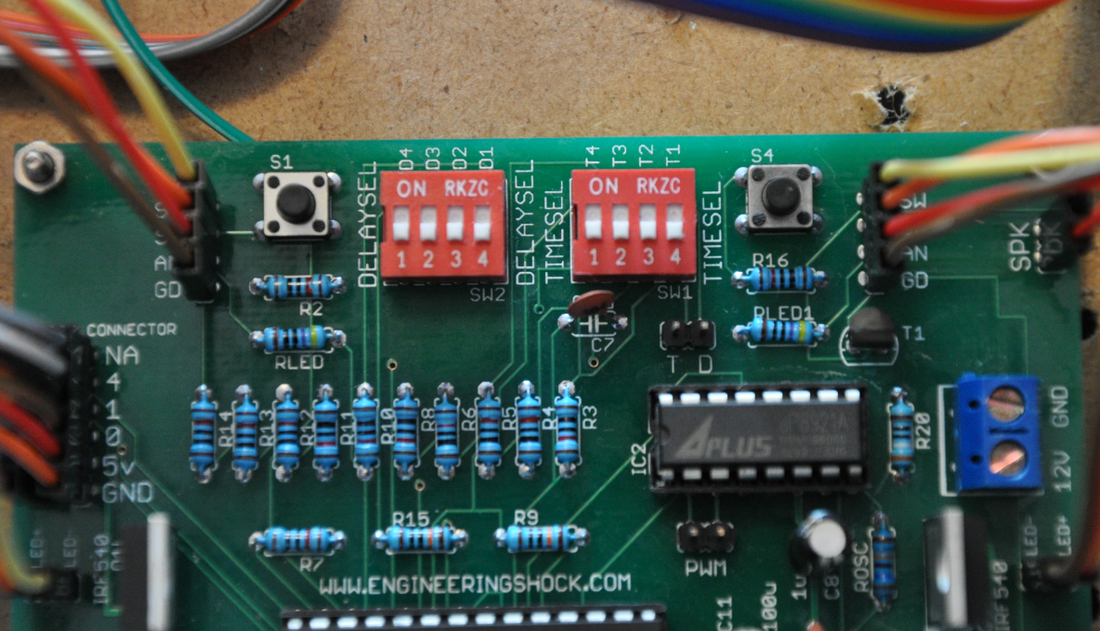
The two 4-channel DIP switches on the main board are labelled "DELAYSEL", for Delay Section, and "TIMESEL" for Time Selection. The DELAYSEL DIP switch dictates the speed of the delay in which the LCD counts from 1 through 9 when a team button is pressed. You can set it to count from 1 to 9 very fast, or very slow. The TIMESEL DIP switch allows for you to choose how fast points will accumulate. By using this DIP switch, you can make point accumulation very fast or very slow. There are four speed settings for both of these delays. After playing a few rounds, you will fine tune what works best for you. You can change these DIP switches on the fly without worrying about damaging anything. However, the changes will not take effect until the system is reset.
The switches on each DIP switch are labelled as below, and offers the following speed options:
D1 - Slow 1-9 Count Speed
D2- Slow-Medium 1-9 Count Speed
D3 - Medium-Fast 1-9 Count Speed
D4 - Fast 1-9 Count Speed
All DELAYSEL DIP Switches Off = Fast 1-9 Count Speed (Same as D4)
T1 - Slow Point Accumulation Speed
T2- Slow-Medium Point Accumulation Speed
T3 - Medium-Fast Point Accumulation Speed
T4 - Fast Point Accumulation Speed
All TIMESEL DIP Switches Off = Fast Point Accumulation Speed (Same as D4)
Winning A Game!:
Once a team accumulates the set amount of poins (+1), the game is over. The LED bank of the team that won will light up, the clock module of the team that won will blink on and off, the unit will say "GAME OVER", and the LCD will read out "GAME OVER - RED or BLUE TEAM WINS!". This will continue on until BOTH the red and green LED buttons are pressed and held at the same time. this will cause a reset. If you wish to change the delay settings for the next game, then this is the time to do it. Make your changes, and press both buttons to reset the system.
Resetting During A Game:
If you want to reset during a game, you need to press both buttons at the EXACT same time. If you don't then the "SETTING CONTROLS 123456789" display will show up on the LCD for whichever team button was pressed first. If this happens, just try again. This has to be precise.
Disclaimer:
This prop module was created specifically to enhance your tactical gaming experience. Engineeringshock Electronics, paintballprops.com, and any affiliates of Engineeringshock Electronics will not be held accountable for losses or consequences caused by the misuse of this product, or any of our products. Furthermore, we will not offer servicing on products that have been modified in any way. By purchasing this product, you are agreeing to the above statement. Engineeringshock Electronics, paintballprops.com, and any affiliates of Engineeringshock Electronics prohibit the re-sale of this product, or any of our products. This product has been designed for the specific use of applications and may not be used for unlawful purposes, uses that are expressly prohibited under the terms, conditions and purpose of its use and diversion contrary to Canadian export laws. No guarantees are given or implied as to the product efficiency and performance. Company, its consultants, partners, agents and employees shall not be liable for any claims, losses, expenses, injuries, or damages arising from or related to the product
OTHER INFORMATION:
RULES:
Rules? We don't need no stinkin' rules! Jokes aside, you make your own rules. Make your own games. The mounting of this unit into your own project box, and how you use it is all up to you. Make it your own!
Power Requirements:
Power is connected through the two pin power terminal block. The pin labelled 12V (On board) is where you connect your positive DC voltage (9-12VDC). The GND terminal is the DC ground terminal for your DC ground line (Negative). A power supply that can source 9v at 500mA or more is nominal. 12v is perfectly fine. The LED banks will be brighter, but the board will require more current. :Lead acid batteries are good, but you can also use a 9v 1A wall adapter to plug into the 5mm jack just to the left of the power terminal block if you are using this indoors. If you have any questions at all, let me know. Strong batteries will ensure that your game doesn't die on you in the field!
Electronics Only? What About A Project Box?
Sorry all! I am an electronics guy. I am not a mechanical guy. I supply the electronics in an assembled and tested state, and you provide the work that will in the end make this prop your own. You make your own project box or fixture. I cannot supply them. If you do make your own fixture, I'd love to see pictures!
Main Board Specifications:
Length: 100mm
Width: 79mm
Height: 20mm
LED Bank Size Specifications:
Length: 80mm
Width: 28mm
Height: 9mm
Clock Module Size Specifications:
Length: 90mm
Width: 36mm
Height: 10mm
LCD Size Specifications:
Length: 80mm
Width: 36mm
Height: 10mm
If you have any questions at all, please do not hesitate to ask! Please make sure to watch the video! Thanks for taking an interest!
The Domination Box - Capture The Flag - Electronic Paintball Airsoft Milsim Prop
$
250.00
Click here for more info
Our prices now include taxes and shipping costs (Post). If you wish to purchase several items, please send a message through our contact page. You'll speak to a real person, and we can offer you a single shipping price will lower your overall costs, and save you money! Responses will be prompt!
Our prices now include taxes and shipping costs (Post). If you wish to purchase several items, please send a message through our contact page. You'll speak to a real person, and we can offer you a single shipping price will lower your overall costs, and save you money! Responses will be prompt!
